

DIY Felt Holiday Gnome
Trend Alert! These adorable Christmas gnomes are everywhere this year! Follow along with our simple tutorial to save money and have fun making your own!
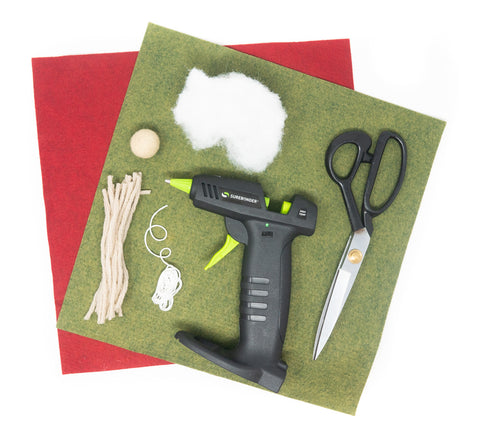
Step 1
Gather your supplies!
You will need:
- 1 green and 1 red piece of wool blend felt (We used Olive & Barnyard Red)
- 1 felt ball in sand dollar
- White or gray yarn
- Pillow Stuffing
- Rice or lentils for weight
- Embroidery thread
Step 2
Start by cutting out your hat piece from your red felt to be 6 1/2" tall and 7" wide at the base with a slight outward curve to each side. Next, from your green felt, cut both a 3" circle and your base piece. Your base should be about 4" wide at the top, 9" wide at the bottom and 5 1/2" tall.

Step 3
Sew up the side of your green felt. Next, pin your circle to the bottom and sew that to the base. Turn your base right side out and fill it with a handful of dry lentils for stability and then fill the rest with pillow stuffing.


Step 4
Sew your red piece into a hat shape. We used a fun embroidery stitch for added detail. Using a hot glue gun, glue this piece onto your base.

Step 5
Glue your felt ball in place for the nose. Fray your yarn with a comb and glue this underneath the felt ball for your beard.

And your little gnome is ready to display for all to see! They make the perfect holiday decor! Try making more than one to display all together!
Share with us how yours turned out by tagging us!
@Overtheriverfelt