DIY Felt Mittens
We loved this DIY project by Purl Soho so much that we had to share it with all of you! Follow along with them to make the cutest felt mittens!
Winter weather brings up a lot of big questions: scarf or cowl? hot chocolate or coffee? And perhaps the most controversial of all: mittens or gloves? I am a mitten person. They keep your hands warmer than gloves; they are a cute classic shape; and on a personal note, they help with my New Year’s resolution to not text while walking! They are also exceptionally easy to sew for yourself, which is a big plus in my book.
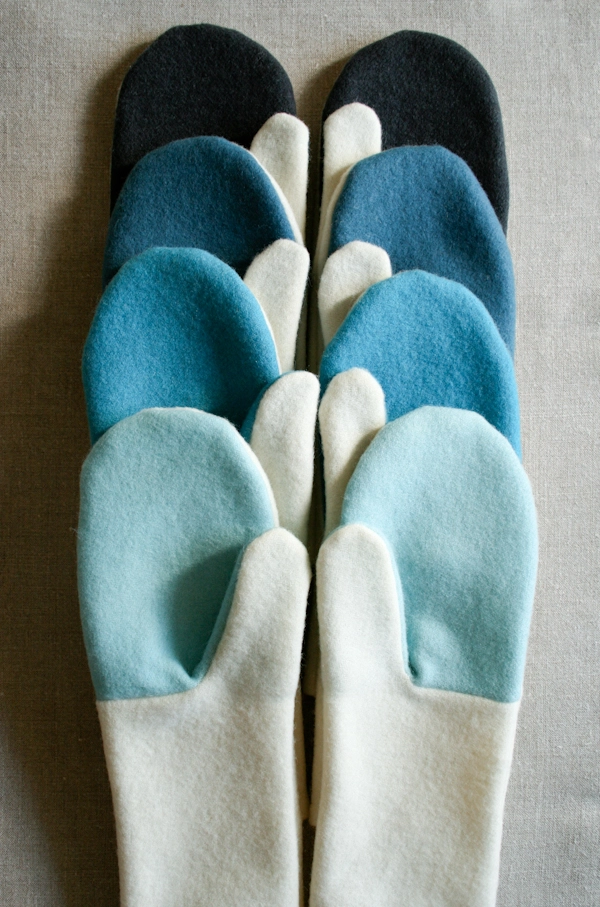
Size
Length from bottom hem to fingertips: 10 1/4 inches
Circumference around palm: 7 inches
Pattern
Cut
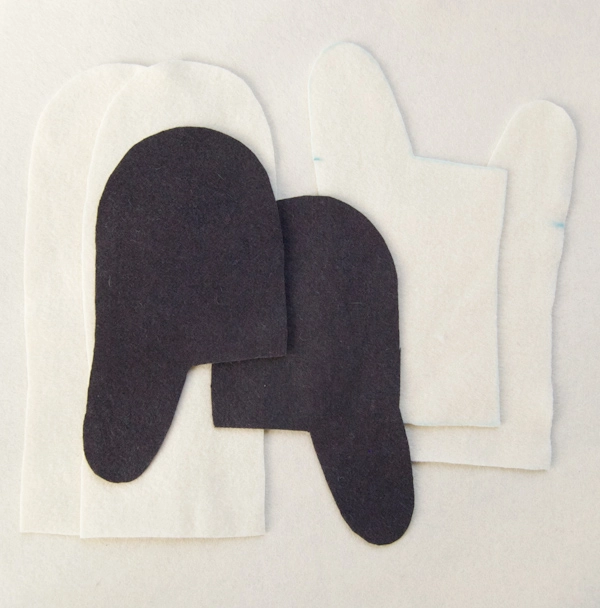
Cut out all of the pieces as directed on the Template. You will have…
- 2 Back pieces in the Main Color
- 2 Wrist pieces in the Main Color
- 2 Palm pieces in the Contrast Color
Mark the pieces as directed on the Template.
Sew

Pin the thumb edge of one of the Palm pieces to the thumb edge of one of the Wrist pieces. Pin around the curve of the the thumb, stopping at the marking.
Pin the remaining Palm piece and Wrist piece together with the thumb facing the opposite direction, as shown above.
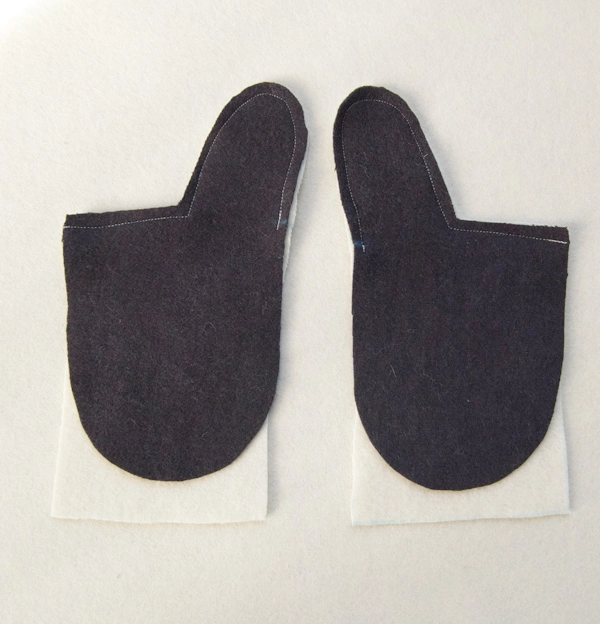
Sew along the pinned edge with a 1/4-inch seam allowance, stopping at the marked point.
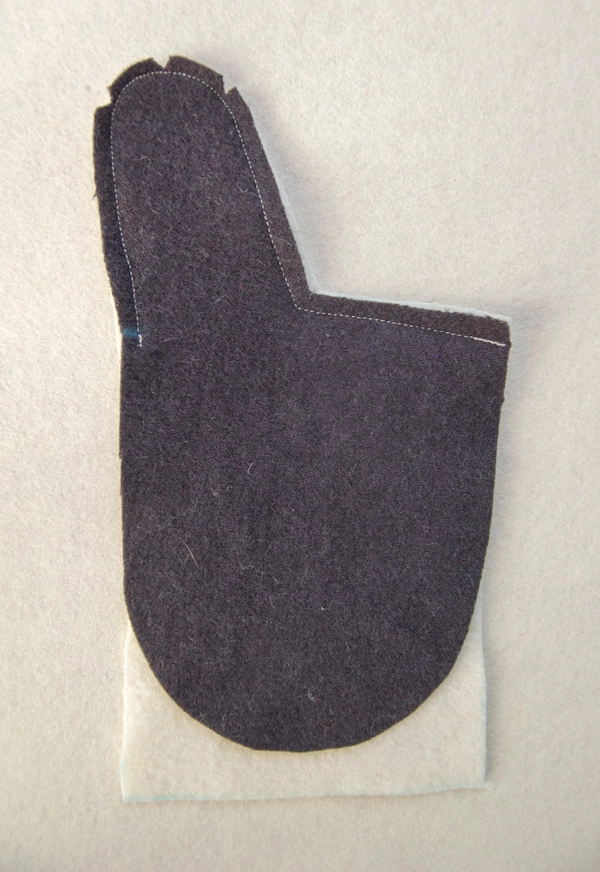
Trim the seam allowance at the tip of the thumb to 1/8-inch and cut a few notches in it, as shown above.
Repeat this for the second mitten.
The sewn-together Palm and Wrist pieces will now be referred to as the Fronts.
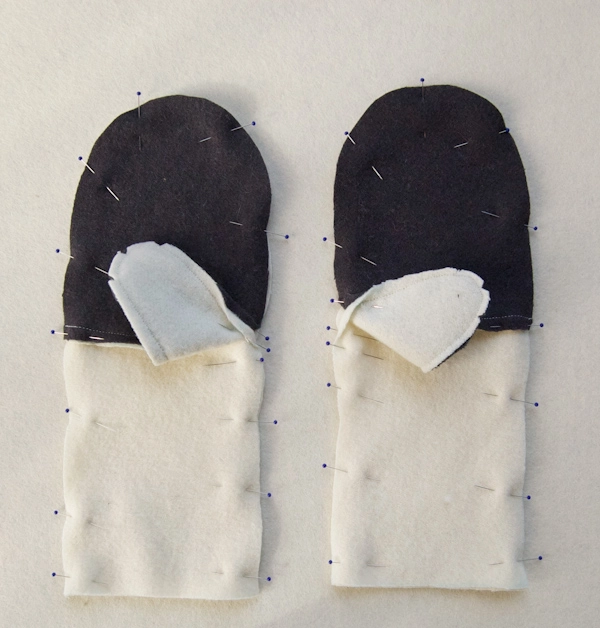
Pin the Fronts to the Back pieces, right sides together. Fold and pin the Front piece’s seam allowance down towards the Wrist piece on the outside edge.
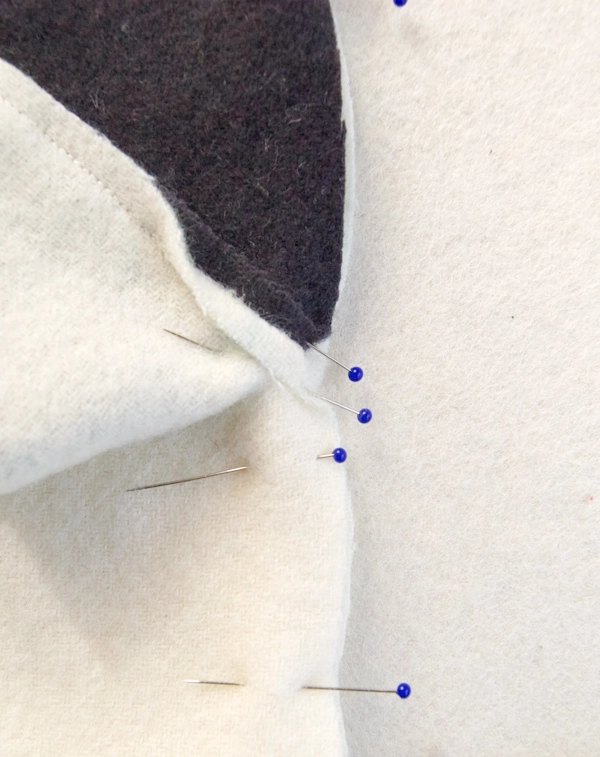
Pin open the seam allowance at the inside thumb edge of the Front piece.
Sew the Front and Back pieces together with a 1/4-inch seam allowance along the entire arched side, leaving the bottom open.
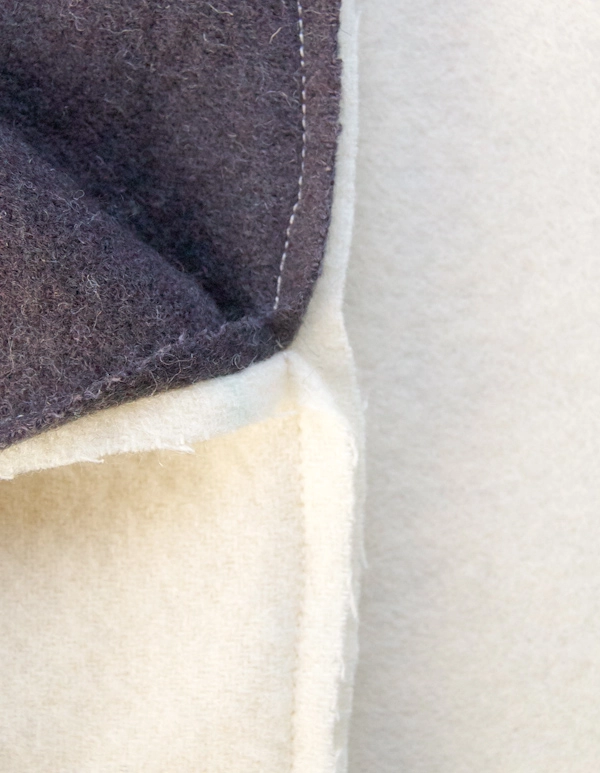
You will sew the folded seam allowances open at the thumb edge, as shown above.
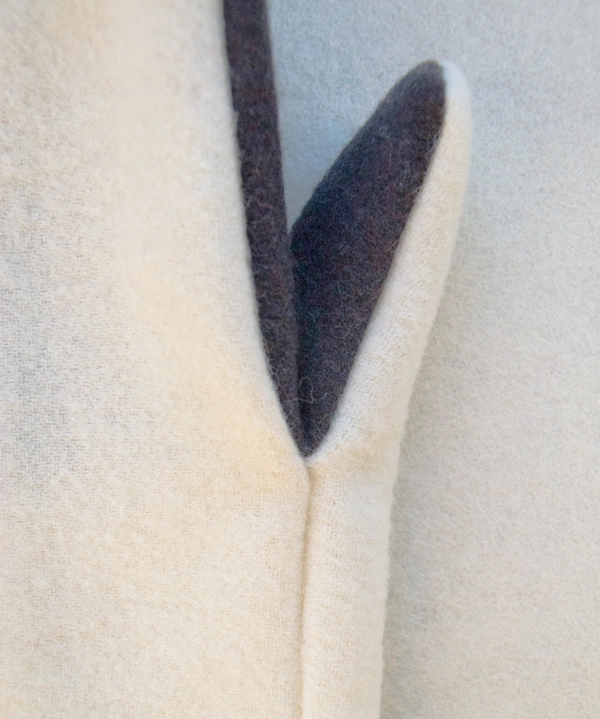
If you’d like to make sure the thumb edge is sewn correctly go ahead and turn the mitten right side out and look at the point where the three pieces meet. It should form a neat Y shape, as shown above. If it doesn’t look like that, go ahead and rip out that section of the seam and try again.
Once you’re sure the thumb edge is sewn properly, turn the mitten inside out again.
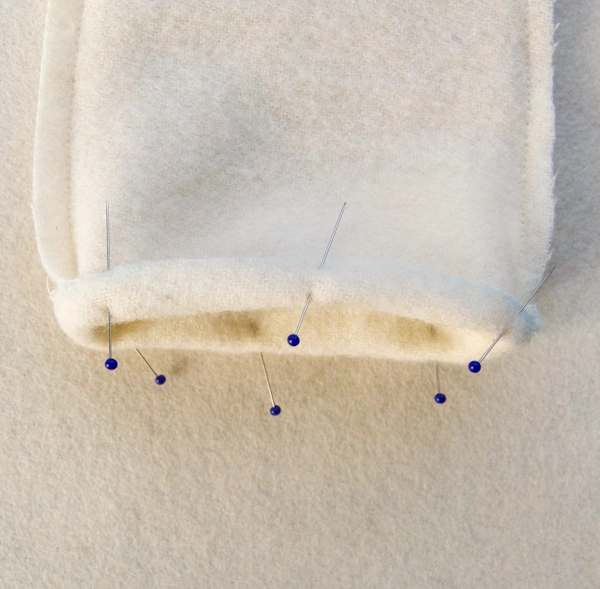
Pin and fold the bottom edge 1/4 inch toward the wrong side, with the side seam allowances open.

Top stitch the bottom hem down.
Cut several notches into the top curve of the mitten, as shown above.

Turn the mittens right side out and you’re all done!
